Upload File to SFTP
Introduction
This document outlines the process for creating a Cloud Scheduler job to upload files to an SFTP server. The job will upload specific files according to a scheduled time and frequency.
Creating a Scheduler for SFTP Uploads
To create a scheduler for this task, follow these steps:
- Navigate to Cloud Scheduler in the Google Cloud Console.
- Select CREATE JOB to begin setting up the scheduler.
Preparation Checklist
Ensure the following resources are in place before scheduling the job:
- SFTP server
- Pub/Sub topic
- Google Cloud Storage bucket
Setup Requirements
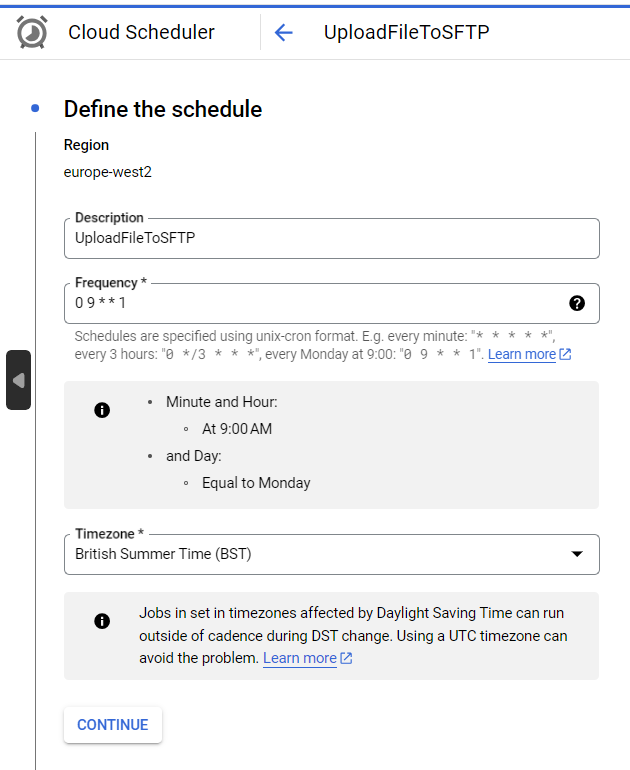
Create a Cloud Scheduler job with the following parameters:
- Name: Upload file to SFTP
- Region:
europe-west2(Select the region closest to your SFTP server for optimal performance) - Frequency:
0 9 * * 1(This cron expression schedules the job to run every Monday at 9:00 AM) - TimeZone: British Summer Time (BST)
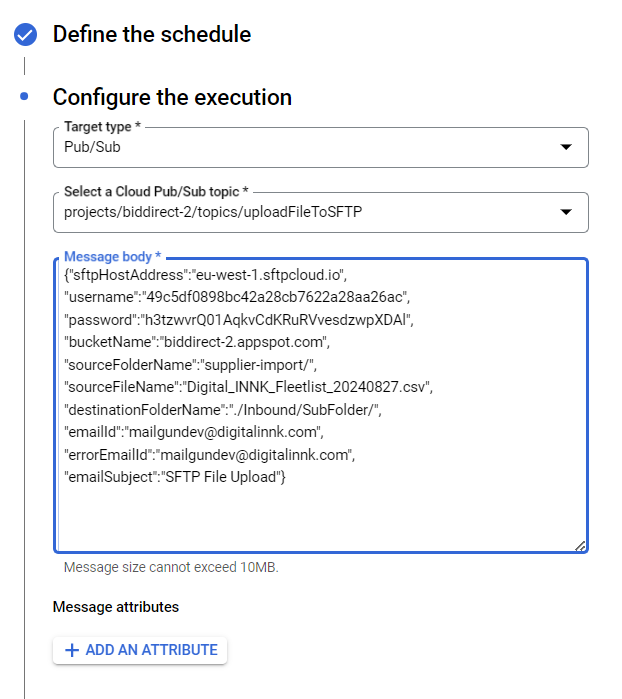
- Target Type: Pub/Sub (This will trigger a Pub/Sub topic when the job is executed)
- Cloud Pub/Sub Topic: There are two versions of this topic:
projects/<projectId>/topics/UploadFileToSFTP(uses password-based authentication)projects/<projectId>/topics/uploadFileToSFTPUsingKeyAuth(uses key-based authentication) (Replace<projectId>with your actual project ID)
Key Generation (Key Based Authentication)
NOTE: Will be added soon... (There will be some changes done in how the secrets will be managed, after that this section will be updated)
JSON Object for SFTP Upload Scheduler
The following JSON object will be used in the Pub/Sub message payload:
Password-based Authentication:
{
  "sftpHostAddress": "eu-central-1.sftpcloud.io",
  "username": "90aed4d72ece4e17ae34bf08834ba559",
  "password": "e6BRyesOeEjT5zWJPdTausExz3DsO1",
  "bucketName": "biddirect-2.appspot.com",
  "sourceFolderName": "supplier-import/",
  "sourceFileName": "/^invoice_\\d{6}\\.txt$/",
  "destinationFolderName": "./Inbound/SubFolder/",
  "emailId": "mailgundev@digitalinnk.com",
  "errorEmailId": "mailgundev@digitalinnk.com",
  "emailSubject": "SFTP File Upload"
}
Key-based Authentication:
{
  "sftpHostAddress": "eu-central-1.sftpcloud.io",
  "username": "90aed4d72ece4e17ae34bf08834ba559",
  "bucketName": "biddirect-2.appspot.com",
  "sourceFolderName": "supplier-import/",
  "sourceFileName": "/^invoice_\\d{6}\\.txt$/",
  "destinationFolderName": "./Inbound/SubFolder/",
  "emailId": "mailgundev@digitalinnk.com",
  "errorEmailId": "mailgundev@digitalinnk.com",
  "emailSubject": "SFTP File Upload"
}
Payload Description
The payload for configuring Cloud Scheduler includes the following parameters:
| Sr.No | Payload | Description |
|---|---|---|
| 1 | sftpHostAddress | The address of the SFTP server where files will be uploaded. |
| 2 | username | The username for authentication with the SFTP server. |
| 3 | password | The password associated with the username for SFTP server access. This is only required for password-based authentication. |
| 4 | bucketName | The Google Cloud Storage bucket name where files are stored before upload. |
| 5 | sourceFolderName | The folder within the bucket containing the source files. |
| 6 | sourceFileName | The specification for the files to be uploaded can be defined in two ways:
|
| 7 | destinationFolderName | The target directory on the SFTP server where files will be placed. |
| 8 | emailId | The email address to receive notifications upon successful uploads. |
| 9 | errorEmailId | The email address to receive notifications if upload fails. |
| 10 | emailSubject | The subject line for notification emails post-upload. |
Scheduler Creation Instructions
To set up the scheduler, follow these steps:
- Define the Scheduler: Configure the name, region, frequency, and timezone.
- Configure Scheduler: Target the Pub/Sub topic you created.
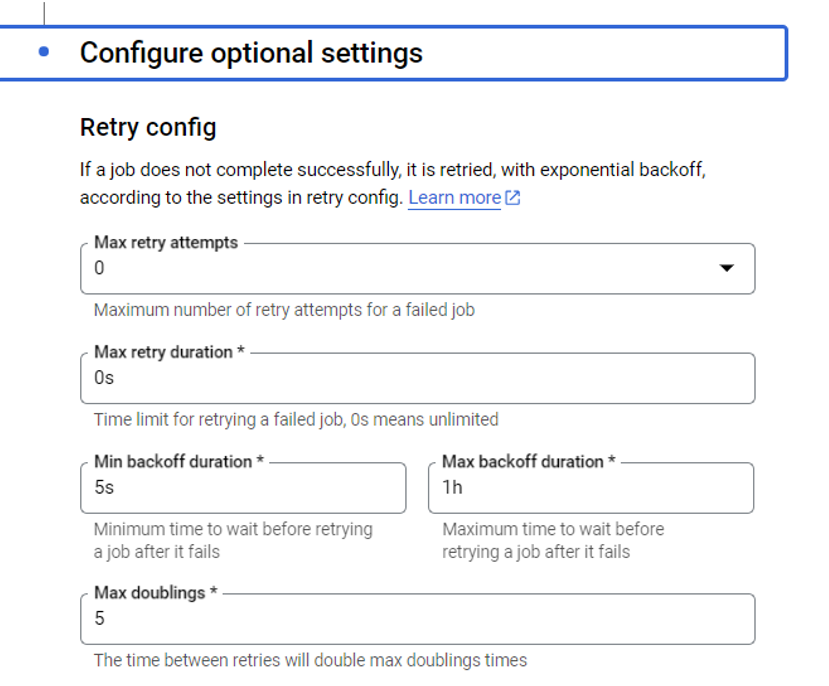
- Optional Settings: Add any required message body or authentication details.
Testing Procedure (Password-based Authentication)
To test the setup, use a free trial demo account from SFTP Cloud:
- Visit the website and click Create test SFTP server.
- Note the temporary host, username, password, and SFTP host details (valid for 1 hour).
- Update the Pub/Sub payload with these details and save the changes.
- Upload a file using this temporary setup.
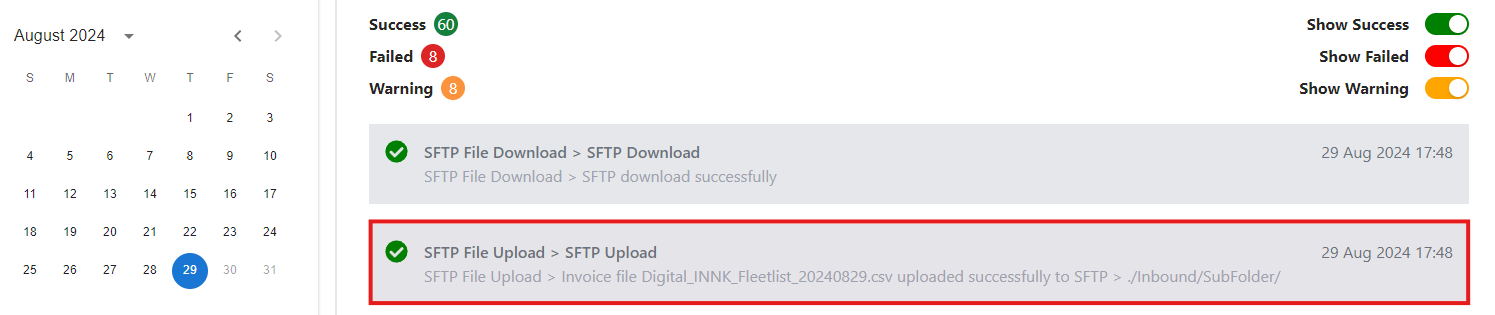
- The process will be logged in the Di-Admin under the Process Log section.
Tip: Use FileZilla to configure the connection and verify the uploaded file.
Status: Approved
Category: Protected
Authored By: Jeyakumar Arunagiri on Aug 29, 2024
Revisions
25 Oct, 2024 - Added details about SFTP server key based authentication - VN-14886 by Gladson